Door Unlock with Face Recognition
Materials
AMB82-mini x 1
SD card x 1
Buttons x 2
Green LED (Optional) x 1
Red LED (Optional) x 1
Servo (Ex. Tower Pro SG90) x 1
220 Ohm resistor (Optional) x 2
10K Ohm resistor x 2
Example
In this example, we will be using Ameba Pro2 development board to create a simple door access control system with face recognition. Door can be unlocked with registered face.
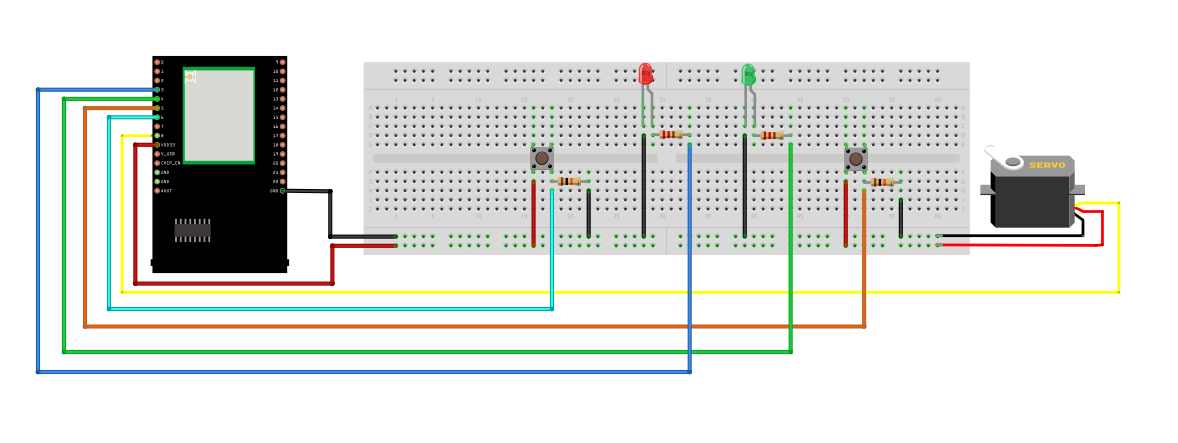
AMB82 MINI wiring diagram:
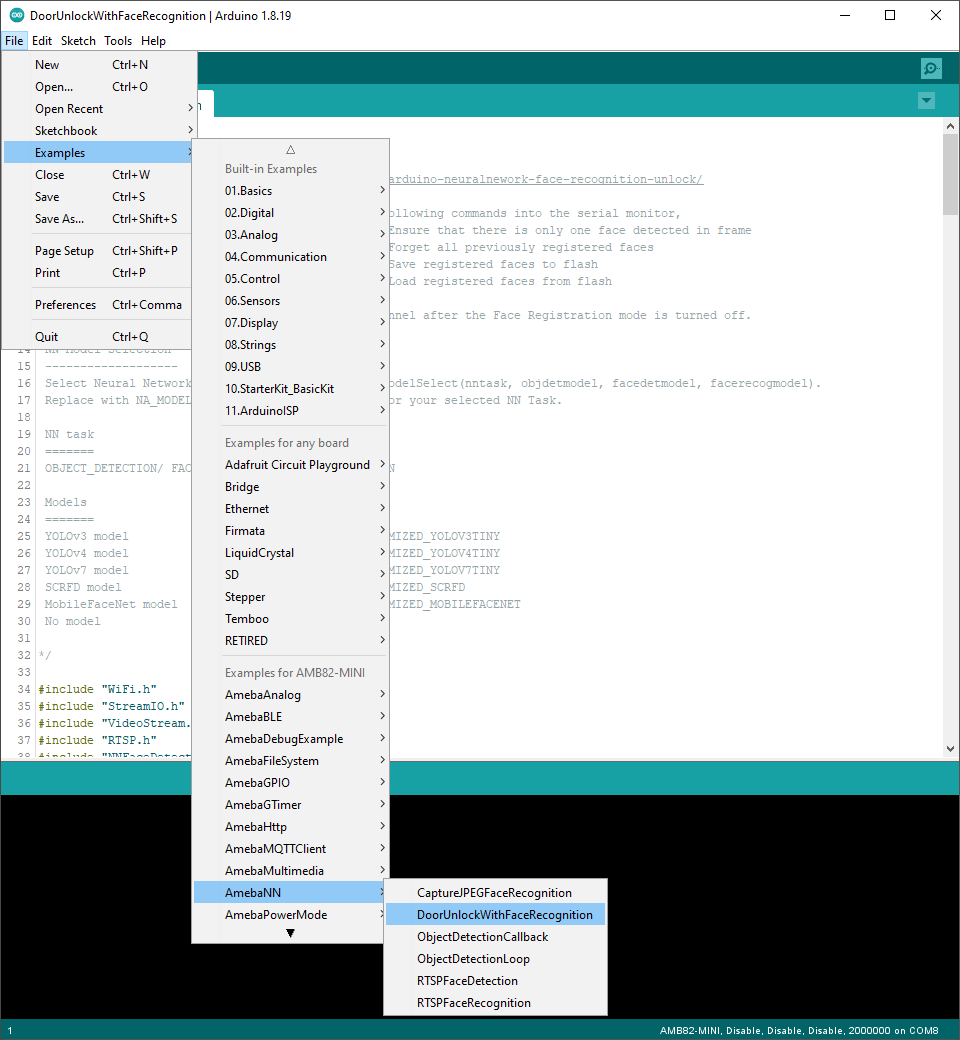
Open the Neural Network example in “File” -> “Examples” -> “AmebaNN” -> “DoorUnlockWithFaceRecognition”.
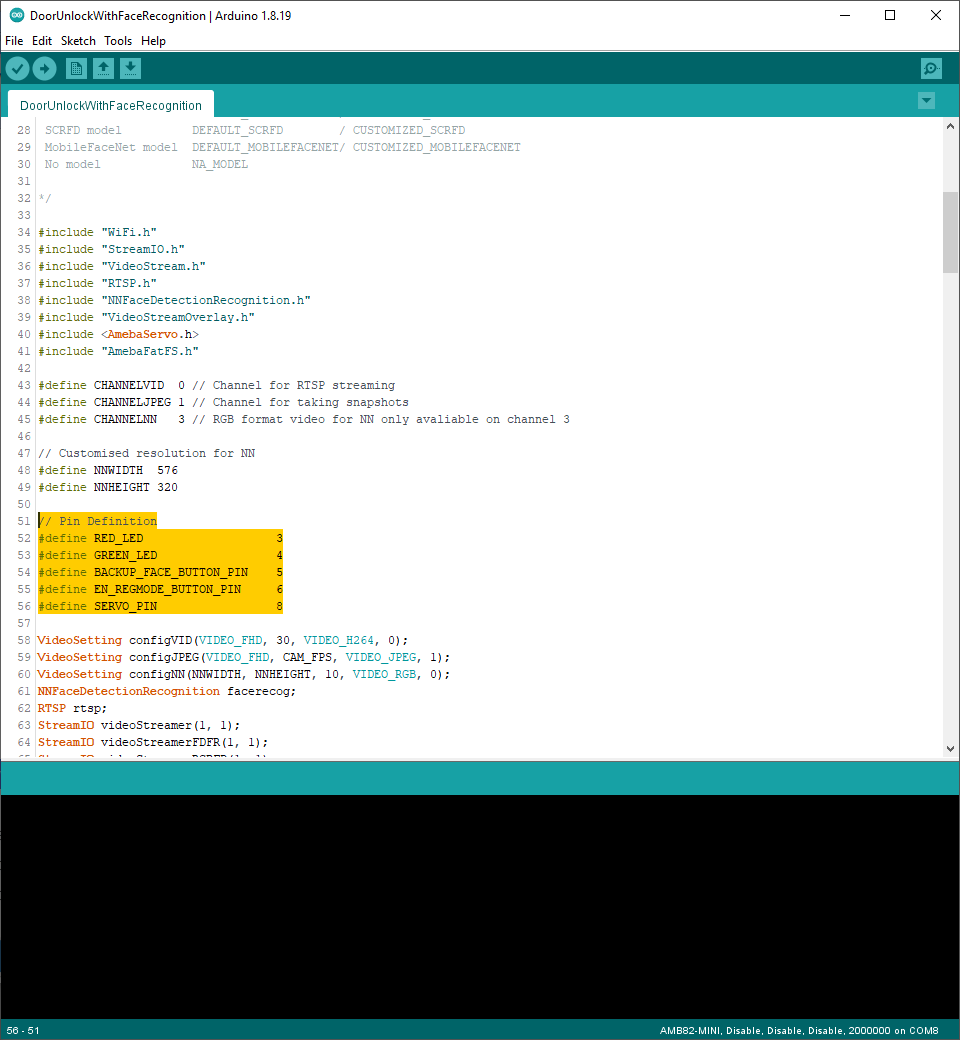
User can define the LED pins by using any GPIO pins or use the on-board LEDs on the board. 2 buttons will be configured to be used as registration button and save button.
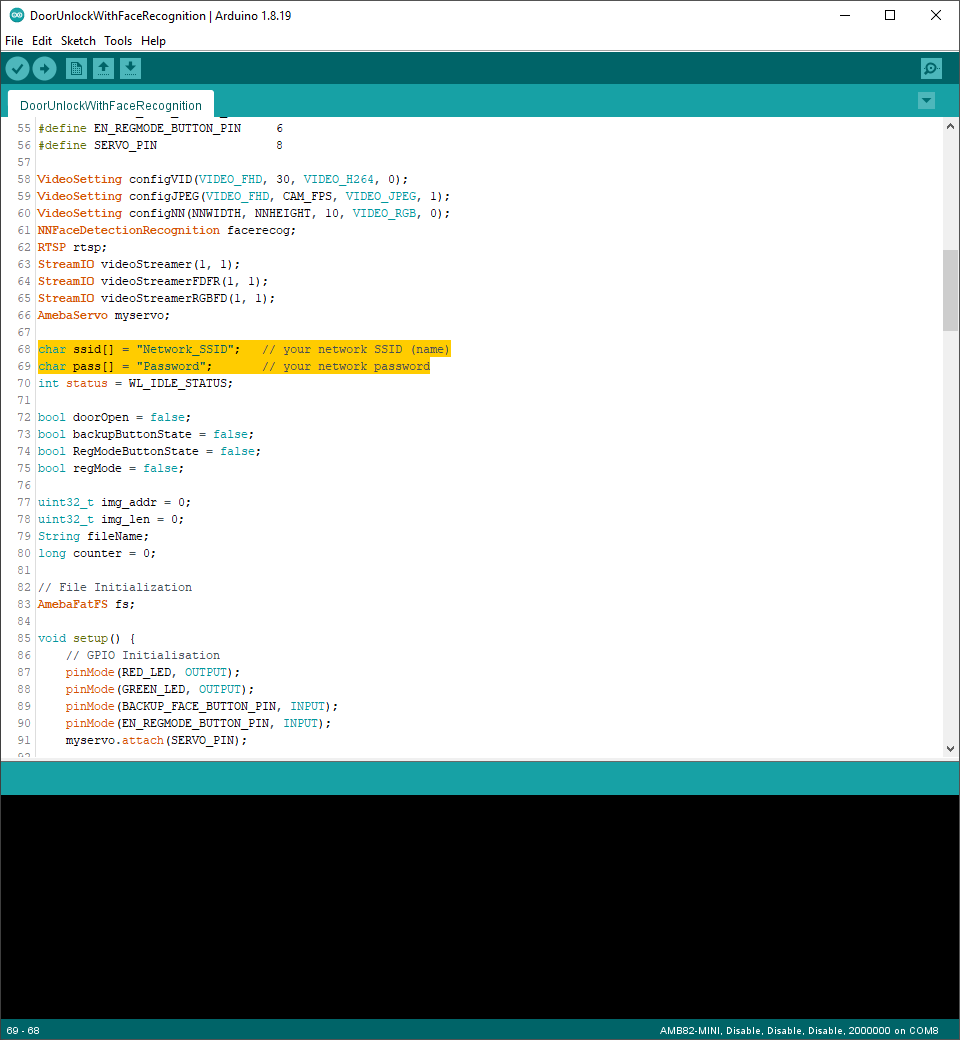
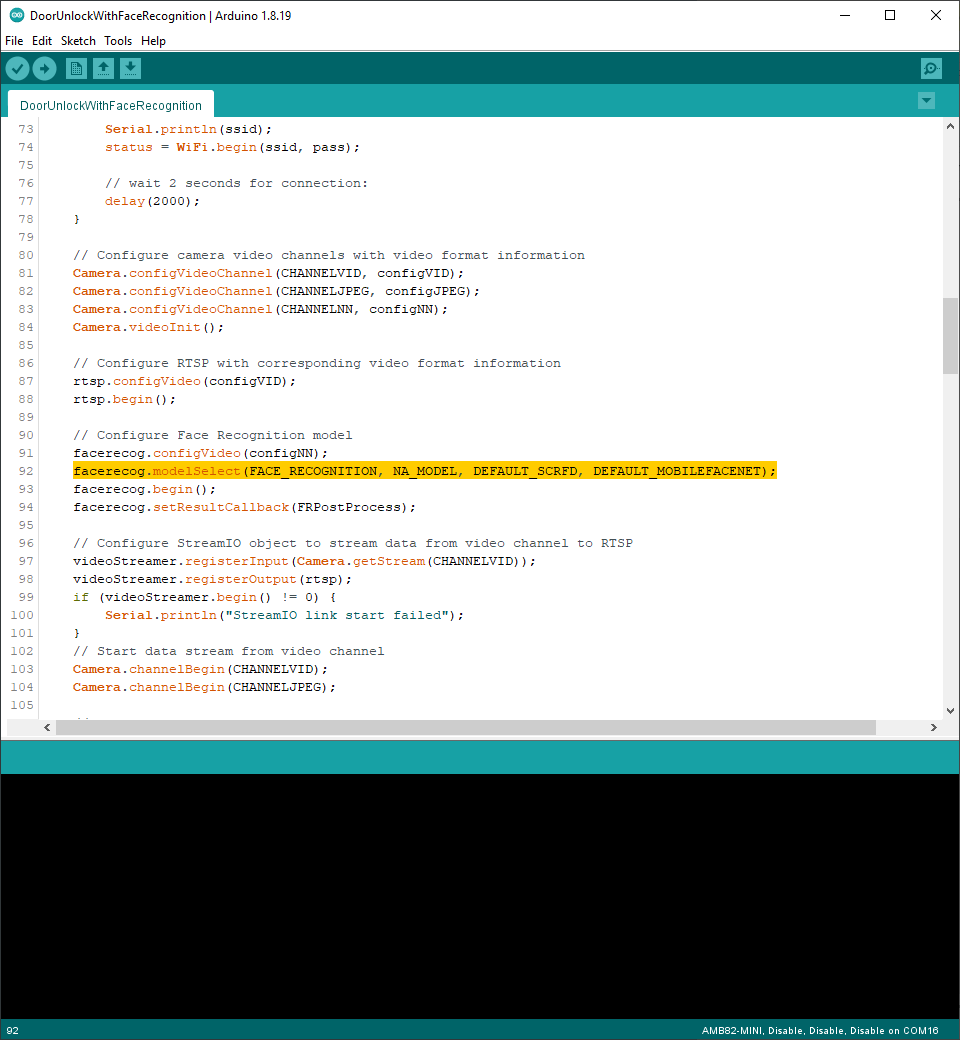
In the highlighted code snippet, fill in the “ssid” with your WiFi network SSID and “pass” with the network password.
Select Neural Network (NN) task and models using modelSelect() function highlighted in yellow. This function takes 4 arguments: Neural Network task, Object Detection model, Face Detection model and Face Recognition model. Replace with “NA_MODEL” if they are not necessary for your selected Neural Network task. Note that it is mandatory to call modelSelect() function before calling the begin() function.
Valid Neural Network task: OBJECT_DETECTION, FACE_DETECTION, FACE_RECOGNITION
Valid Object Detection model:
YOLOv3 model: DEFAULT_YOLOV3TINY, CUSTOMIZED_YOLOV3TINY
YOLOv4 model: DEFAULT_YOLOV4TINY, CUSTOMIZED_YOLOV4TINY
YOLOv7 model: DEFAULT_YOLOV7TINY, CUSTOMIZED_YOLOV7TINY
Valid Face Detection model: DEFAULT_SCRFD, CUSTOMIZED_SCRFD
Valid Face Recognition model: DEFAULT_MOBILEFACENET, CUSTOMIZED_MOBILEFACENET
Choose the customized option (e.g., CUSTOMIZED_YOLOV4TINY/ CUSTOMIZED_SCRFD/ CUSTOMIZED_MOBILEFACENET) if you would like to use your own NN model. To learn about the process of converting an AI model, refer to https://www.amebaiot.com/en/amebapro2-ai-convert-model/ . Additionally, refer to https://www.amebaiot.com/en/amebapro2-apply-ai-model-docs/ to understand how to install and use the converted model.
Compile the code and upload it to Ameba. After pressing the Reset button, wait for the Ameba Pro 2 board to connect to the WiFi network. The board’s IP address and network port number for RTSP will be shown in the Serial Monitor.
The result can be validated using VLC. You may download VLC media player from the link here.
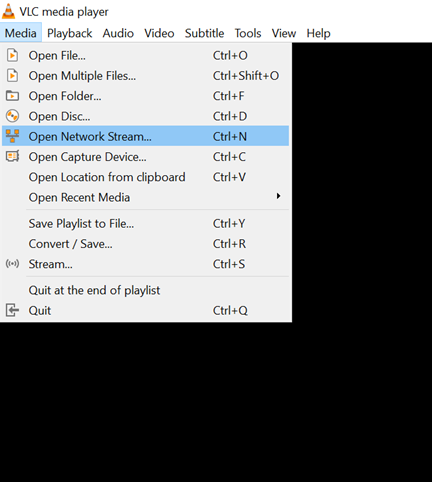
Upon the completion of the software installation, open VLC media player, and go to “Media” -> “Open Network Stream”.
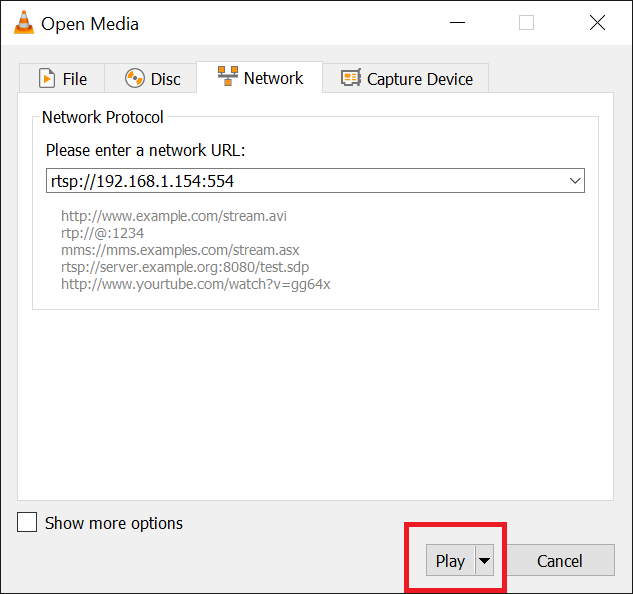
Make sure your PC is connected to the same network as the Ameba Pro2 board for streaming. Since RTSP is used as the streaming protocol, key in “rtsp://{IPaddress}:{port}” as the Network URL in VLC media player, replacing {IPaddress} with the IP address of your Ameba Pro2 board, and {port} with the RTSP port shown in Serial Monitor (e.g., “rtsp://192.168.1.154:554”). The default RTSP port number is 554.
Next, click “Play” to start RTSP streaming to see the result. The video stream from the camera will be shown in VLC media player.
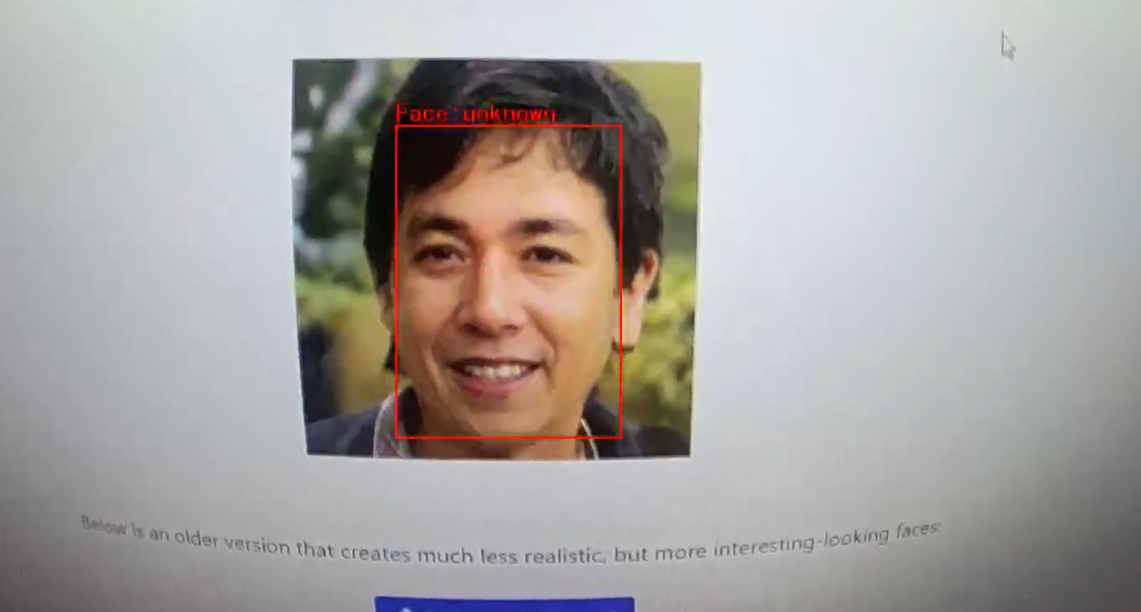
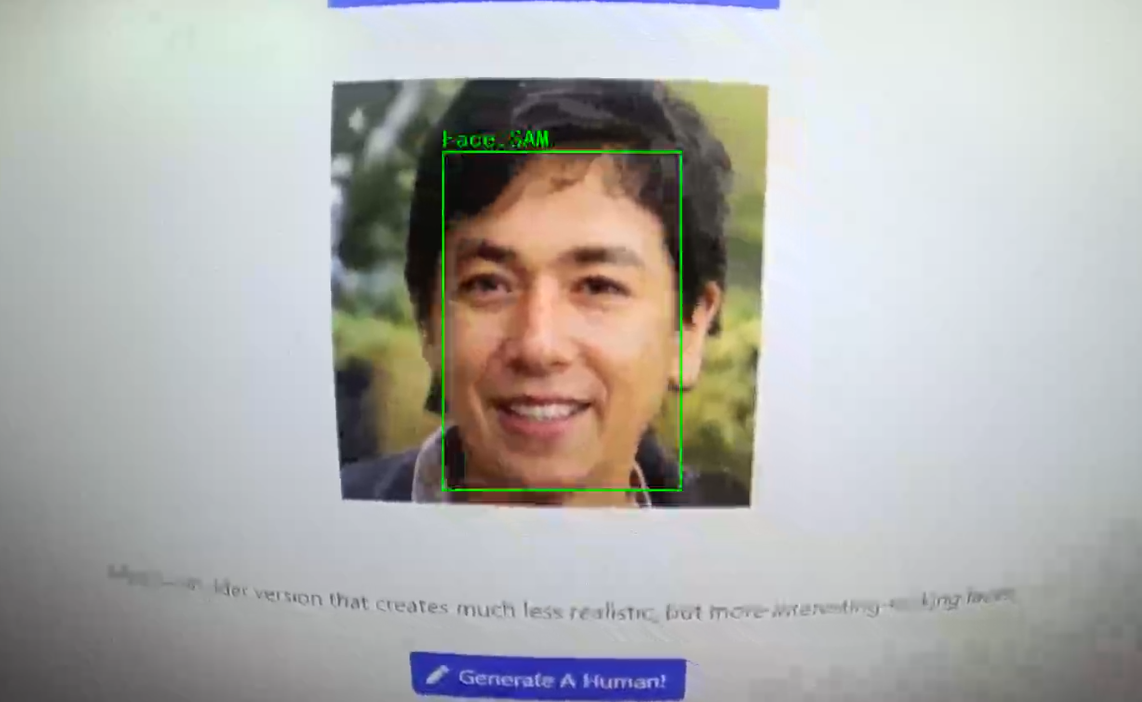
The faces detected by the face recognition neural network model are initially labelled as “unknown”, faces need to be first registered with a name before they can be recognized.
Registration mode will by default be disabled and face recognition will start.
To enter registration mode to register faces:
Press the registration button configured previously. When it is in registration mode, both LEDs will turn on and you may use the following command to backup and restore faces, register, delete specified faces, and reset all faces.
To register a face
Note: Multiple faces can be registered. However, when registering a face, ensure that there is only one face in the frame.
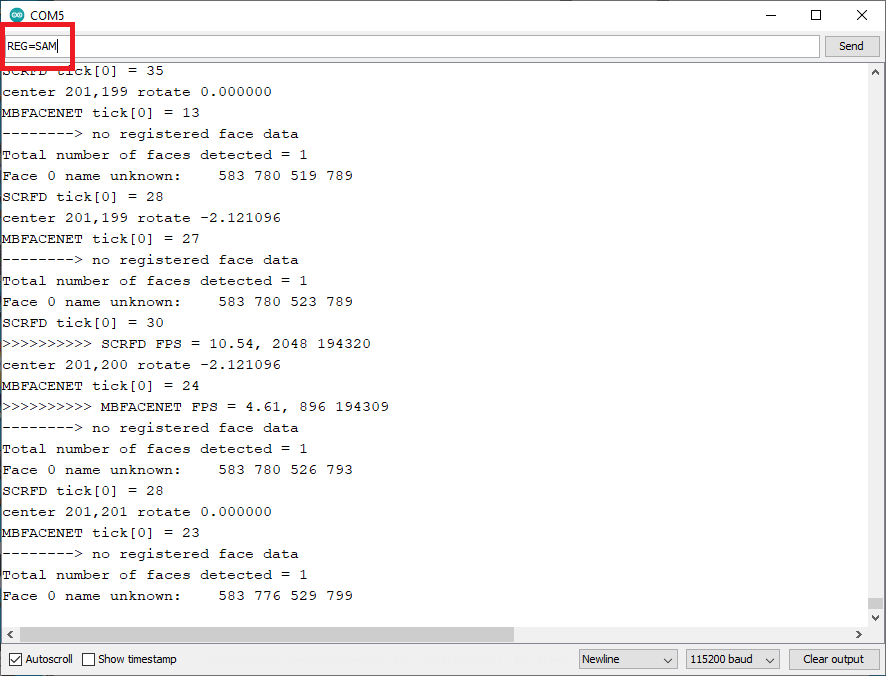
To start registering, aim the camera at a face and enter “REG={Name}” in the Serial Monitor to give the targeted face a name. For example, “REG=SAM”.
To remove a specific registered face:
Enter the command “DEL={Name}” to delete a certain registered face. For example, “DEL=SAM”.
To reset all registered faces:
Enter the command “RESET” to forget all previously registered faces. All previously assigned faces and names will be removed. You may register a face again by entering the face registration mode.
To back up and restore faces:
Enter the command “BACKUP” to save a copy of registered faces to flash. If a backup exists, enter the command “RESTORE” to load registered faces from flash.
To exit registration mode to start recognizing faces and unlock door:
Upon the registration of faces, press and hold the save button which was configured earlier for 3 seconds. Both LEDs will start to blink and exit registration mode; Registered faces will be saved to flash, and recognition mode will start.
If more than one face or single unknown face is detected, the door will remain locked and red LED will light up. If a registered face is detected, green LED will light up and door will be unlocked (servo turned 180 degree) for 10 seconds. A snapshot will be taken and named as {registeredName}{counter}.jpg and stored into an SD card.
