NAU7802 Low Power
Materials
For more information on
Example
Introduction
This example shows how to setup low power consumption on Sparkfun NAU7802.
Procedure
Connect the Load Cell to NAU7802.
Connect the red wire of Load Cell to RED pin (Excitation +) of NAU7802.
Connect the black wire of Load Cell to BLK pin (Excitation -) of NAU7802.
Connect the green wire of Load Cell to GRN pin (Signal +) of NAU7802.
Connect the white wire of Load Cell to WHT pin (Signal -) of NAU7802.
Connect the AMB82-mini to NAU7802.
Connect the VDD33 of AMB82-mini to 3V3 of NAU7802.
Connect the GND of AMB82-mini to GND of NAU7802.
Connect the Pin 12 (I2C_SDA pin) of AMB82-mini to SDA of NAU7802.
Connect the Pin 13 (I2C_SCL pin) of AMB82-mini to SCL of NAU7802.
Note
Download User Guide to understand more on pin definition.
Tip
Depending on your NAU7802 version, some may support 5V+ operating voltage—please check the official website before you connect to a 5V power supply. If your NAU7802 supports 5V+ operating voltage, connecting to V_USB instead of VDD33 tends to have less jitter effect.
The final wiring should look like the diagram below.
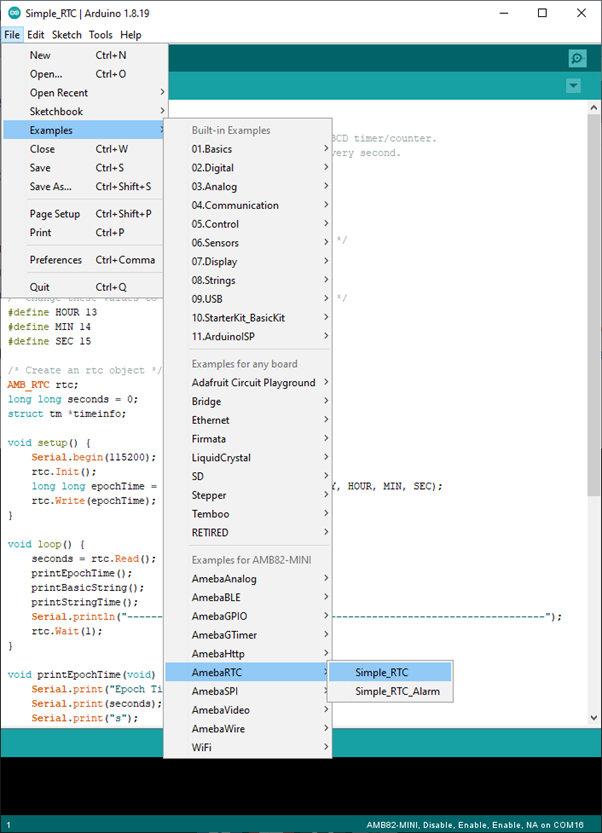
Open the example in File -> Examples -> AmebaWire -> NAU7802 -> LowPower
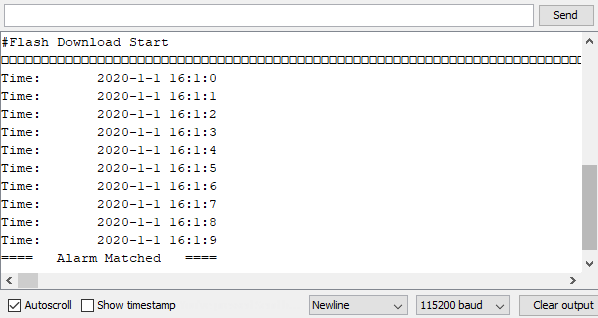
Compile and run the example.
While this allows low power consumption, if you powerDown() and powerUp(), the first reading takes much longer to read after power-up. For this example, it takes around 50 ms process a reading immediately after powerDown() and 11 - 12 ms to process a reading if no powerDown() triggered.